以下の手順は参照用に残しています。
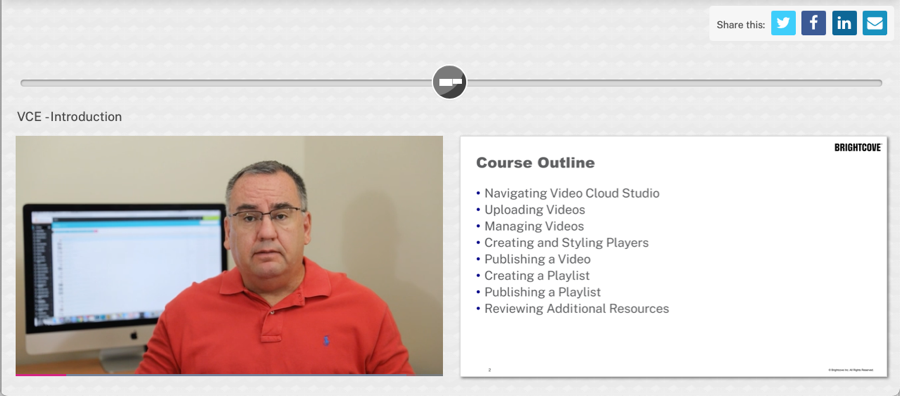
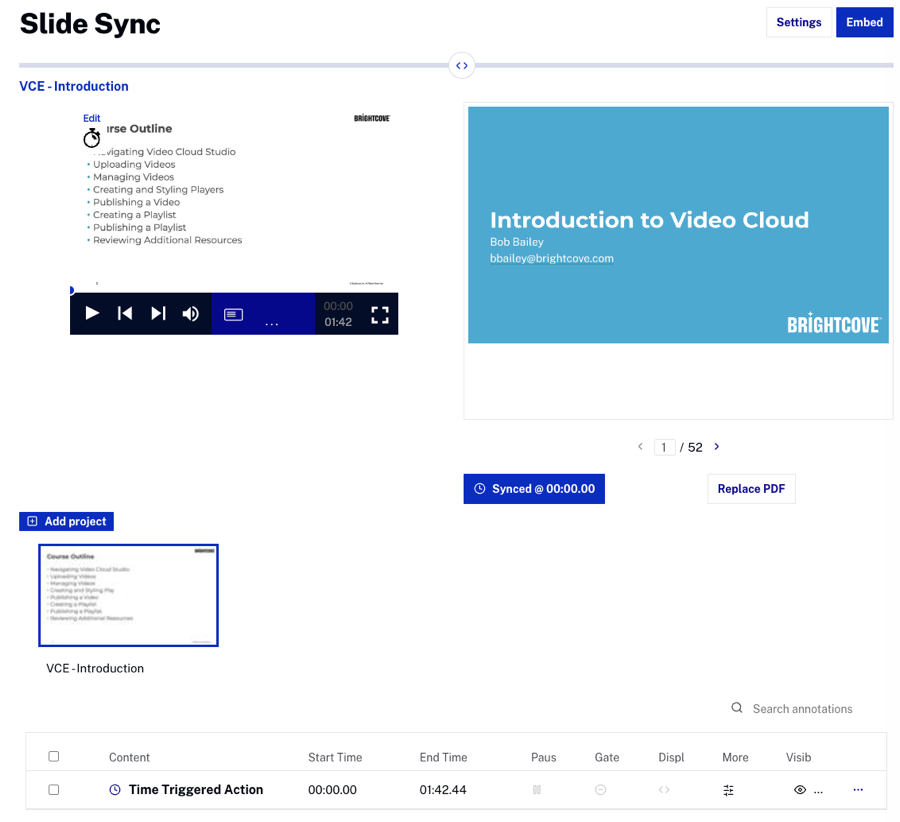
スライド同期エクスペリエンスは、ビデオと関連するPDFを並べて表示する機能です。ビデオの再生に合わせて、PDFのページがビデオで提示されている内容に対応して切り替わります。また、ビデオのインタラクティビティもすべて表示されます。
新しいエクスペリエンスの作成
以下の手順に従って、新しいスライド同期エクスペリエンスを作成してください:
- Video Cloud Studio にログインします。
- Interactivity モジュールを開きます。
- 左側のナビゲーションで エクスペリエンス > すべてのエクスペリエンス をクリックします。
- をクリックします。
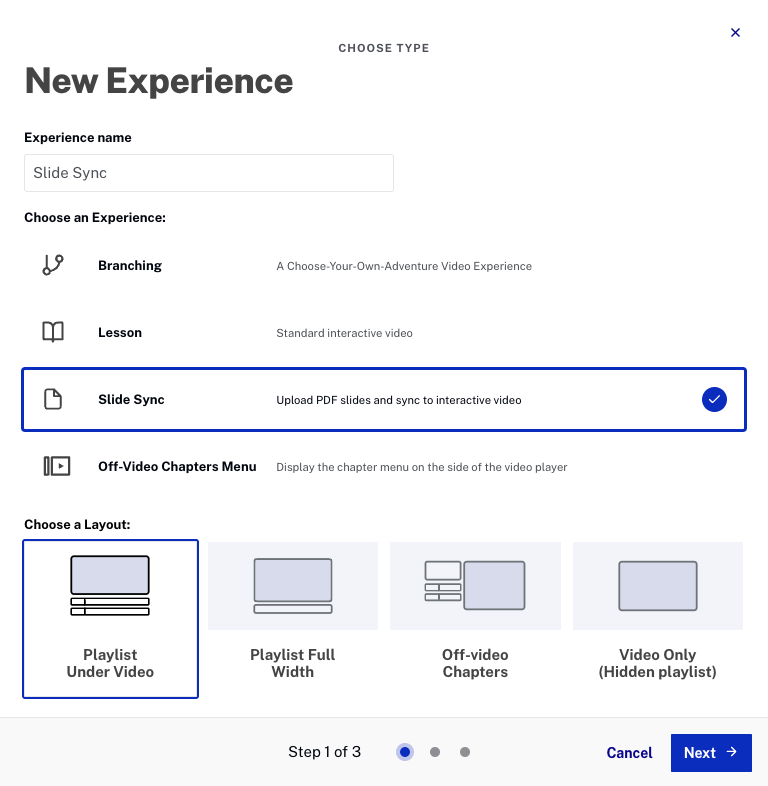
- エクスペリエンス名 を入力します。
- エクスペリエンスタイプのリストから スライド同期 をクリックします。
- レイアウトを選択します。
- をクリックします。
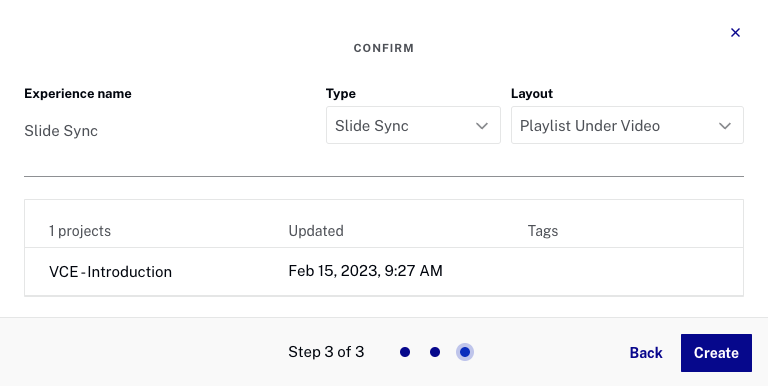
- エクスペリエンスに追加するプロジェクトを1つ以上選択します。
- をクリックします。
- エクスペリエンス設定を確認し、 をクリックします。
- 注釈 エディターが開き、選択した最初のビデオが表示されることを確認します。エクスペリエンス内のすべてのビデオがプレビュー再生画面の下に表示されます。
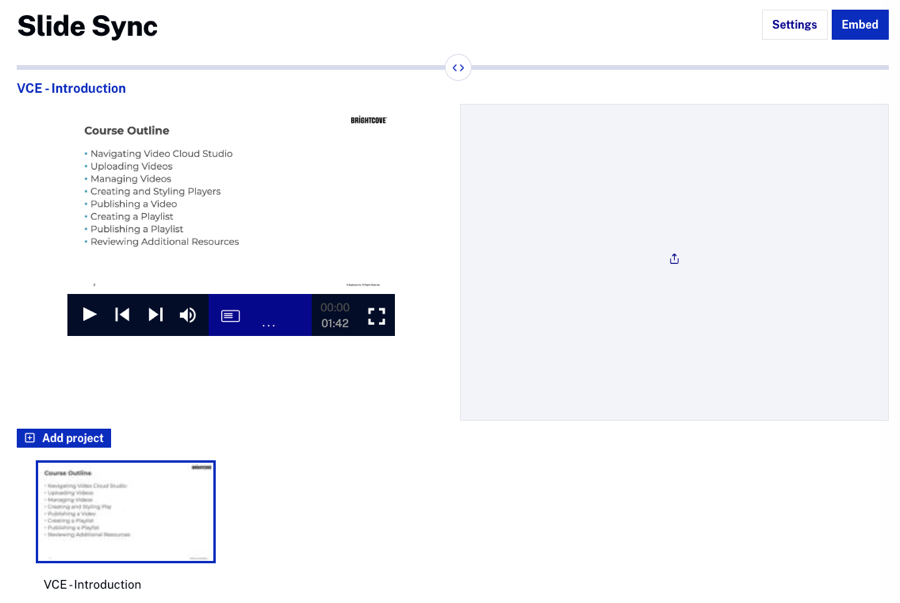
- ドロップゾーンにファイルをドラッグするか、ドロップゾーン内をクリックしてファイルを選択し、PDFスライドをエクスペリエンスに追加します。
- スライドはPDF形式である必要があります。
- PDFの最初のページが表示され、ビデオの0秒地点に同期されます。
スライドの同期
ビデオとスライドを同期させるには、以下の手順に従ってください:
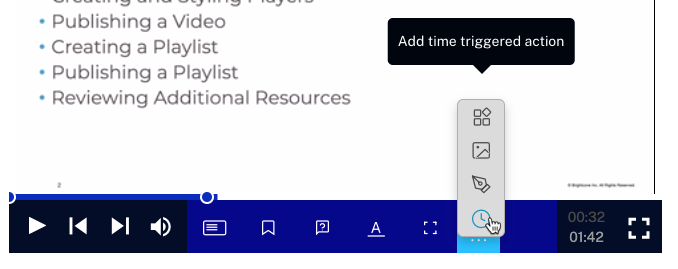
- ビデオを再生し、スライドを変更するタイミングに合わせます。
- PDFプレビューの下にある矢印アイコンを使って、ビデオ内の対応する場所に表示するページに移動します。
- PDFプレビューの下にある ボタンをクリックして、ビデオの現在の位置に合わせてPDFを同期させます。
- (オプション) スライドの変更と同時にチャプター マーカーを追加するには、スライドを同期させた後にチャプター マーカーアイコンをクリックし、チャプター タイトルを入力してから 完了 をクリックします。
- すべてのスライドがビデオと同期するまで、これらの手順を繰り返します。
ビデオとスライドのサイズ比率の変更
ビデオとスライドのサイズ比を変更するには、以下の手順に従ってください:
- ビデオに時間トリガーアクションを追加します。
- Addon Type (アクションの種類) に
sliderを入力します。 - Command (コマンド) に
changeを入力します。 - Command Data (コマンドデータ) の横にある ADD NEW (新規追加)をクリックします。
- Key (キー)に
newValueを入力し、Value (値) にはビデオが占めるべき幅のパーセントを入力します。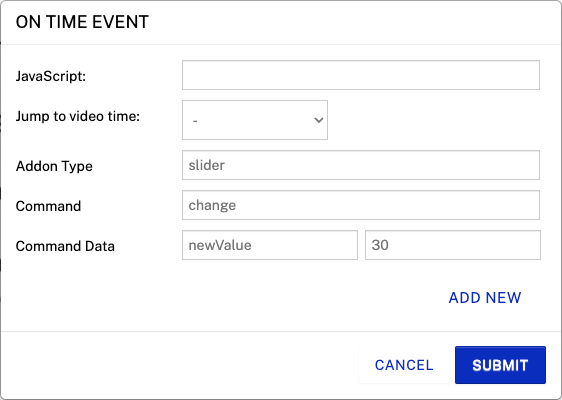
- (送信) をクリックします。
他の注釈の追加
他の注釈は、他のインタラクティブ ビデオプロジェクトに追加するのと同じ方法でビデオに追加できます。
ビデオとスライドの追加
- 別のビデオを追加するには、をクリックして、さらにプロジェクトを追加します。
- 追加のビデオを選択します。
- をクリックします。
エクスペリエンスの埋め込みとプレビュー
ウェブページやアプリケーション内でエクスペリエンスを表示するには、埋め込みコードを生成する必要があります。プレビュリンクを共有するか、エクスペリエンスの専用ランディングページを生成することもできます。詳細については、エクスペリエンスの埋め込みコード生成を参照してください。
エクスペリエンス設定の構成
エクスペリエンス設定を使用すると、エクスペリエンスのタイトルやタグを変更したり、エクスペリエンスの動作を制御したりできます。詳細については、エクスペリエンスの作成と管理を参照してください。